• Skip to main content
  • Skip to secondary menu
  • Skip to primary sidebar
  • Skip to footer

Growing Organic Food in Your Backyard

Grow Better Food!
  • Home
  • Start Here
  • Seed Starting
  • Hoop House
    • Grow Tomatoes in a Hoop House
    • Grow Cucumbers in a Hoop House
    • How to Grow Carrots in Winter
    • Winter Sowing Made Better
  • Sponsor
  • Search
  • Subscribe

The Importance of Hardening Off Seedlings

by Bill Brikiatis

Updated: February 28, 2020

How important is it for you to harden off seedlings before transplanting them in the ground? It’s important. No question about it.

Why? Too much sun, wind or temperature change can set your plants back weeks. They may never recover.

Table of Contents

  1. What is hardening off?
  2. Two biggest dangers of hardening off
  3. Can plants get sunburned?
  4. Five-step hardening off method
  5. Greenhouses, hoop houses and cold frames
  6. The bottom line

Let’s take a sec to get the legal words out of the way. This article may contain affiliate links. That means if you click and buy from my partners, I will make a tiny amount of money at no cost to you. This in no way affects my recommendations.

What is hardening off?

So what exactly is hardening off, and why is it so important?

Hardening off is the process of gradually getting your plants ready for a more difficult outdoor environment. Wind, cold or hot temperatures and sun scalding are all potential threats that can shock or even kill your baby seedlings.

At the beginning, all they’ve known is the cushy life under the indoor grow lights or the hoop house. Hardening off is kind of a boot camp to prepare them for the war of natural selection that is waiting for them outside your home.

The key point to hardening off is that you gradually build up the amount of time seedlings are outdoors. This will be less “tiring” on your baby plants.

When putting young seedlings out in the sun for the first time, you have to be careful they don’t get “sunburned.”

Two biggest dangers of hardening off

The two biggest dangers when hardening off seedlings are cold and wind. You can mitigate both risks by stopping the hardening off process and bringing plants inside when the weather is bad.

Related: I Tested the Top 4 Seed Starting Mix Products. This is What I Learned

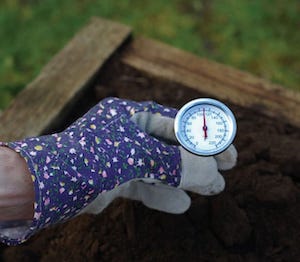
If you have a lot of seedlings, moving plants in and out can become a full time job. It’s good to know when your plants are actually in danger so that you only move them when needed. Here’s a handy temperature chart that lets you know when it’s too cold to leave them out:

Minimum “Stay Alive” Temperatures
All temperatures are In Fahrenheit.
It’s best to stay well above these temps.

Minimum Temp Vegetable
40 degreesbroccoli, brussels sprouts, kohlrabi, cabbage, onions, leeks, parsley
45 degreescelery, Chinese cabbage, lettuce, endive
50 degreessquash, pumpkin, sweet corn
55 degrees cucumber, muskmelon
60 degreesbasil, tomatoes, peppers

Can plants get sunburned?

Many people think that wind and cold temperatures are the only reasons for hardening off. Not true. It turns out that the sun itself is another critical threat.

Sun can dehydrate plants in a way that is similar to sunburn in humans. Cutin, which is a waxy substance that protects plant leaves from dehydration, is built up gradually with exposure to sun. It acts sort of like melanin in humans. Too much sun all at once and your seedlings could go into shock from dehydration because they don’t have enough cutin.

Can you take shortcuts with this process? Probably.

— Suburban Hobby Farmer

Often, this will set your plants back a couple of weeks while they recover. At worst, they may never recover.

Five-step hardening off method

How to harden off seedlings. Use this method for the best possible results.

Time it takes to harden off seedlings: About 14 days.
What you’ll need for this project: 
— level outdoor spot,
— seedlings.
Step #1: Start two weeks before transplanting.
The secret to successful hardening off is to do it gradually. The best possible method is to start two weeks before you plant your seedlings in the ground. This will give your babies time to adjust to the changing environment.
Pick Plants
https://suburbanhobbyfarmer.com/wp-content/uploads/2020/05/pick-plants.jpeg
Step #2: Place plants outside for one hour.
You should place your plants in the location where you intend to plant them. It’s important that it is not windy because your plants don’t have the strength to handle wind. On the first day, it’s better if it’s not too hot. Cloudy conditions are best.
Outside 1 Hour
https://suburbanhobbyfarmer.com/wp-content/uploads/2020/05/one-hour-plants.jpeg
Step #3: Increase the time outside each day by one hour.
Again, wind is the big danger. You don’t want to damage the plants with too much wind. Heavy rain also is a problem. Skip a day if conditions aren’t right. A LITTLE wind and very light rain is a good thing. Obviously, you don’t want put plants out if it’s too cold. One more point: start early in the day and gradually build up to early afternoon. Noon to 2 p.m. is the harshest time for your plants.
Increase Time
https://suburbanhobbyfarmer.com/wp-content/uploads/2020/05/increase-plant.jpeg
Step #4: Leave plants out overnight after two weeks.
When you get up to 14 hours outside, you can leave plants out all night. You still want to monitor weather conditions. Avoid wind and cold.
Plants at Night
https://suburbanhobbyfarmer.com/wp-content/uploads/2020/05/plants-night.jpeg
Step #5: Measure soil temperature & plant in the ground.
If the soil temperature is warm enough, you can plant your seedlings now. How do you know? Read Transplant at Proper Soil Temperature.
Soil Thermometer
https://suburbanhobbyfarmer.com/wp-content/uploads/2020/04/soil-temp.jpg

Greenhouses, hoop houses and cold frames

Protected culture techniques like greenhouses, hoop houses and cold frames add another wrinkle to the hardening off story.

Moving seedlings from indoors to hoop house

I’ve had a lot of experience moving seedlings from inside, where it’s a constant 68 degrees F, to a hoop house where the temperature often changes dramatically from one minute to the next.

In late winter when it is cloudy, the hoop house is often very cold. But when it’s sunny, it can be very warm. I’ve noticed that plants that are moved from inside to a cold frame or hoop house need to adapt to the climate slowly.

Fortunately, the hoop house plastic covering seems to reduce the impact of sunlight. Even if your plants received some sun through an indoor window as they were growing, hoop houses still present sunburn challenges for your seedlings. Also, the wild temperature changes can give seedlings trouble.

Related: A Hoop House is a Tomato Growing Machine

But it’s not as tough on the plants as moving straight from under the grow lights to the garden soil. You don’t have to be as gradual in their exposure when you use a hoop house.

Transplanting seedlings from hoop house to garden

What about moving plants from the hoop house to the garden? You need to get plants ready to exit the hoop house well before it’s time to transplant. Depending on the outdoor temperatures, you should try to gradually get seedlings used to the outside by opening the hoop house windows more and more each day. This will help them get used to the outdoor temperatures.

Related: Grow a Million Cucumbers in a Hoop House

On the other hand, sunlight isn’t as much of a problem. The sun is already pretty strong in a nursery greenhouse, cold frame or hoop house. Your seedlings won’t need gradual exposure to sunlight when they are already in the half way house.

The bottom line

Can you take shortcuts with this process? Probably. You could probably double the time your seedlings spend outdoors each day instead of adding an hour. Just make sure the weather conditions are right.

The bottom line is when you are putting plants outside, even when they are coming from a cold frame or hoop house, you should gradually get them used to the outdoors. The more time you take to get them used to it, the better your chances of success.

Related posts:

  1. Transplanting Seedlings Outdoors
  2. Better Tomatoes with Walls O Water
  3. I Shopped for Hoop House Kits. A Review of the Three I Considered

Suburban Hobby Farmer is a participant in the Amazon Services LLC Associates Program, an affiliate advertising program designed to provide a means for sites to earn advertising fees by advertising and linking to amazon.com.

Pin
Share
Tweet

Filed Under: 2. Intermediate -- A Little Difficult to Complete, Planting Tagged With: cold frame, seed starting

Primary Sidebar

Meet the Blogger

Bill Brikiatis

Hello! I’m Bill Brikiatis. I started this website in 2010 to help you get better at growing organic food in your backyard.

I’ve been growing fruits and vegetables for nearly all my life. And I'm over 60.

That’s not to say that I don’t make mistakes. I make plenty, then I write about them so both you and I get better at growing great things to eat.

You can read more about me and Suburban Hobby Farmer on my about page.

Most Popular on SHF

  1. How to Get Free Seeds from the U.S. Government. It's Easy If You Know How
  2. How to Use Chicken Manure Pellets in the Vegetable Garden
  3. Which Seed Starting Mix is Best? I Tested Them
  4. What Are the Benefits of Pruning Tomato Plants?
  5. I've Used a Rain Barrel Downspout Diverter for 10 years. Here's What I Know.
  6. Grow Millions of Cucumbers in a Hoop House
  7. I Shopped for Hoop House Kits. A Review of the One I Bought.
  8. Do Tumbling Compost Bins Work?
  9. Can you plant potatoes in the fall? Absolutely!
  10. What are the Best Potting Benches for Vegetable Growers?

Search This Site for Articles

Growing Tomatoes

Growing Tomatoes

Learn Everything I Know About Growing Tomatoes

Extending the Growing Season

  1. A Hoop House is a Tomato Growing Machine
  2. Coldframe Kits Make It Easy to Extend the Growing Season
  3. Grow a Million Cucumbers in a Hoop House
  4. I Shopped for Hoop House Kits. A Review of the Three I Considered
  5. Growing Salad Greens in Winter. Here's How to Do It
  6. Better Tomatoes with Walls O Water
  7. How to Grow Carrots in Winter
  8. Winter Sowing Made Better

Improving Soil

  1. How to Use Chicken Manure Pellets
  2. Three Important Soil Building Techniques
  3. Grasscycling and Composting Grass Clippings
  4. What is "Deep Litter" in a Chicken Coop?
  5. Why Grow Cover Crop and Which Ones?
  6. Mulching Raised Garden Beds
  7. Five Gardening Ideas from Building Soils Naturally
  8. Should You Use Neptune's Harvest Liquid Fertilizer?
  9. How to Use Aquarium Fish Water to Fertilize Plants
  10. Using Chop & Drop to Improve Your Soil
  11. How to Improve Your Soil
  12. What is OMRI? Why Should Organic Gardners Care?
  13. Winter Ground Covers for Vegetable Gardens

Collecting Water with Rain Barrels & Downspout Diverters

  1. My Automatic Downspout Diverter
  2. Rain Barrel Downspout Diverters
  3. Fixing an Overflowing Rain Barrel
  4. Oatey Mystic Rainwater Collection System / Downspout Diverter

Composting Articles

  1. Do Tumbling Compost Bins Work?
  2. How to Compost Faster
  3. Worm Composting Not So Easy
  4. Worm Composting Not So Easy, Part II
  5. Worm Composting Not So Easy, Part II
  6. Free, 77-page Worm Composting Guide
  7. Grasscycling and Composting Grass Clippings
  8. The Best Worm Food
  9. Making Compost in a Chicken Coop

Footer

My Recommendations

  • Start Here
  • Subscribe
  • Things I Like

SHF Info

  • Advertising Info
  • Affiliate Policy
  • Article Sponsorship
  • Privacy

Blogger

  • About
  • Contact

© Suburban Hobby Farmer 2020