Updated: January 1, 2020
Worm composting, a.k.a. vermiculture, seems perfect for when the leaves drop from the trees and the mercury dips consistently below freezing. Organic gardeners jonesing for a compost fix turn to worms to satisfy their addiction.
If you are one of those “addicted” gardeners, there are countless Internet pages written about worm composting to help you out. My estimate is that 90 percent of those pages say that if you just do this, this, this and this, you’ll get great worm castings organic fertilizer.
But I’m speaking from experience when I say, if you want to get a plentiful, free supply of usable castings out of your worm bin, it’s not as easy as the writers claim.
I’ve tried three times, and in each case, the end result wasn’t what I wanted. Maybe my expectations were too high.(This is the first of a three-part article. For the articles, see worm composting II and worm composting III.)
Let’s take a sec to get the legal words out of the way. This article may contain affiliate links. That means if you click and buy from my partners, I will make a tiny amount of money at no cost to you. This in no way affects my recommendations.
The promise of worm composting
Worm composting promises the backyard gardener much. You can actively compost your fruit and vegetable scraps (and not just freeze them in the compost tumbler) in winter.
Worm castings are a very high quality soil amendment. One interesting video from Bitter Tonic claims that it is the third best after bat and eel compost.
Worm compost makes a very good enhancement to homemade potting soil for my very early spring (really winter) lettuce crop that I grow in my small hoop house.
This post is not on how to start a worm bin
There are a billion posts and videos showing you how to set up a worm bin with red wigglers, so I’m not going to add to the piles of information. The Compost Guy has a very good worm composter bin set up video. It gives excellent step-by-step instructions for inexpensively setting up a system. In his blog, The Compost Guy refers to himself as a “vermiholic.” This gave me a chuckle.
Instead, I’m going to provide six vermiculture lessons I’ve learned through trial and error. The first three are in this article. For the rest, you’ll need to see worm composting II and worm composting III.
Lesson 1: If there’s a way out, worms will find it
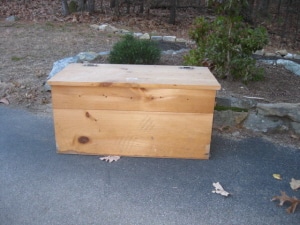
The first time I set up a worm bin I used a small wooden chest. This was because I read that wood absorbs excess moisture. While this is true (and good), it turns out that the chest had gaps. This was good for air flow. But many worms escaped. Each day there would be new, dried out worms who had crawled to their death on the basement floor.
Lesson 2: Use paper for worm composting bedding
I’ve tried it with and without shredded paper bedding.
Using paper bedding is best. But it’s not perfect. Why? Because worms eat the paper last. They go for things like banana peels first.
Like my daughter, they eat tasty stuff and leave the rest until they’re really hungry.
After a couple of months of continuously adding small amounts of food, all I typically have in the bin is worm castings stuck to paper strips. This isn’t ideal for a soil additive.
On the other hand, when I tried it without bedding, it worked pretty well for a while. But after a few months of adding scraps there were significantly fewer worms. I’m not sure why. I’ve been very careful with the types of foods I put in. I think it was because of too much nitrogen, which created a toxic environment.
It seems that the best method is to fill the bin three quarters of the way with food scraps and bedding and then just let it sit until everything is eaten. My mistake was to keep adding materials as you go.
Lesson 3: Separating the “wheat from the chaff” is not easy
Separating the worms from the compost, without losing your worms, can be trying.
One method is to:
- Take clumps of compost and put them in the sun. The worms will migrate away from the light.
- Wait 10 minutes and remove a little off the top of each pile. The worms will migrate to the bottom of the pile each time you remove castings.
- Be sure to wear dishwashing gloves because the oil from your hands could damage the little buggers.
- Keep in mind, with this method, you still lose the worm eggs in the harvested compost.
The next article will share the most important lessons I’ve learned. In the meantime, let me know your most important worm composting lessons by commenting on this post.
Related articles you might enjoy:
- Worm Composting Not So Easy, Part II
- Worm Composting Not So Easy, Part III
- Free 77-page Worm Composting Guide
Suburban Hobby Farmer is a participant in the Amazon Services LLC Associates Program, an affiliate advertising program designed to provide a means for sites to earn advertising fees by advertising and linking to amazon.com.
